19 National Park Tips Every First-Time Visitor Should Know
I’ve made most of the mistakes on this list at one point or another, showing up without a plan, missing a reservation window, standing in a parking lot at a trailhead that filled up two hours earlier than I expected. National parks reward a bit of planning far more than most other travel destinations, mostly because they’re dealing with huge visitor numbers on infrastructure that wasn’t built for it.
None of this is complicated once you know it, but almost none of it is obvious the first time around. These are the 19 things I wish someone had told me before my first few park trips, covering everything from planning to actually navigating the park once you’re there.
19. Book Lodging and Campsites Far Earlier Than Feels Necessary
Popular parks fill up lodging and campsite reservations six months or more in advance for peak season, and first-timers consistently underestimate how far ahead this needs to happen. By the time you’re actually planning the trip in detail, the best options are often already gone.
Check the specific park’s reservation system as early as possible, some open exactly a set number of months in advance and fill within hours. If you’re flexible on dates, shoulder season travel dramatically improves your odds of getting a reasonable reservation.
18. Check for Timed Entry or Reservation Requirements
A growing number of popular parks and specific areas within parks require a timed entry reservation, separate from any campsite or lodging booking, and missing this requirement can mean being turned away entirely. This system varies substantially by park and even by season within the same park.
Research the specific park’s current entry requirements well before the trip, since these policies change from year to year. Don’t assume a park you’ve visited before still has the same entry system it did last time.
17. Arrive at Popular Trailheads Early
Trailhead parking for popular hikes fills up shockingly early, sometimes before sunrise during peak season, and arriving even an hour later than expected can mean parking a significant distance away or not getting a spot at all. This is one of the most common frustrations first-time visitors run into.
Check ahead for typical fill times for your specific trail, some parks publish this information, and plan to arrive earlier than that. An early start also tends to mean better wildlife viewing and fewer crowds on the trail itself.
16. Download Offline Maps Before You Lose Cell Service
Cell service is unreliable or nonexistent in most national parks once you’re away from the main visitor areas, and relying on a live map connection is a common first-timer mistake. Most park websites and mapping apps offer offline download options specifically for this reason.
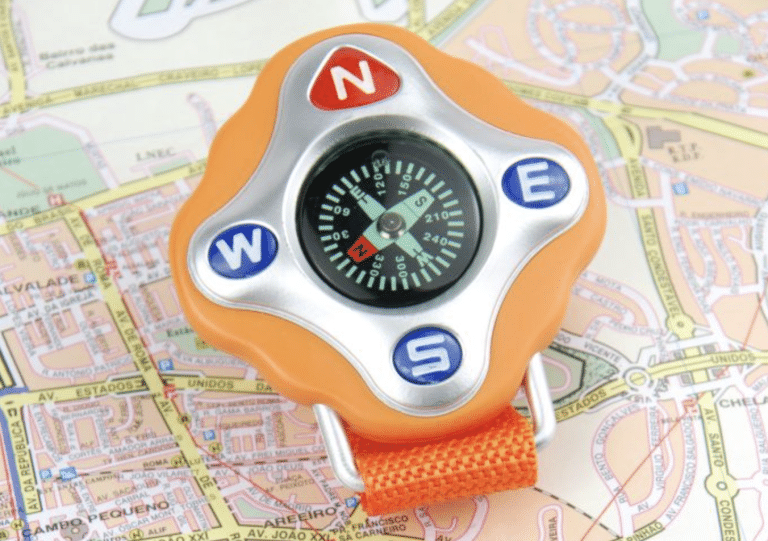
Download trail maps and park maps before you arrive, ideally while still on reliable wifi or cell service. A physical paper map from the visitor center is a solid backup in case of a dead phone battery.
15. Don’t Underestimate Elevation’s Effect on Hiking Time
Many national parks involve significant elevation, and hiking at altitude is noticeably more tiring than the same distance at sea level, something first-timers from lower elevations often don’t account for. Trail time estimates online don’t always factor this in accurately for every visitor’s fitness and acclimation level.
Plan for slower pace and more frequent breaks than you’d expect at lower elevation, especially in the first day or two of a trip. Staying well hydrated helps manage some of the effects of altitude, though it’s not a complete solution on its own.
14. Pack Layers Regardless of the Season
Weather in many national parks, especially those with significant elevation range, can shift dramatically over the course of a single day. A warm, sunny morning at a lower elevation can turn into a cold, windy afternoon higher up the same trail.
Pack layers you can add or remove as conditions change, rather than dressing for a single expected temperature. This applies even in summer, when higher elevations can still be surprisingly cold.
13. Check Which Areas Require a Shuttle Instead of Personal Vehicles
Some popular parks restrict personal vehicle access to certain areas during peak season, requiring visitors to use a park shuttle system instead. Not knowing this ahead of time can mean arriving at a closed road or a parking area with no available spots.
Research the specific park’s shuttle system and any vehicle restrictions before the trip. Shuttle schedules and pickup points are usually available on the park’s official website well in advance.
12. Bring More Water Than Feels Necessary
Dry climates and higher elevations dehydrate visitors faster than they expect, and many popular hikes have limited or no water sources along the way. Underestimating water needs is one of the more common reasons hikers end up in real trouble in national parks.
Carry more water than seems necessary for the stated hike length, especially in hot or dry parks. Refill at any available stations before starting a hike, rather than assuming you’ll find water along the way.
11. Respect Wildlife Distance Requirements
National parks have specific, often legally enforced, distance requirements for wildlife encounters, and getting too close for a photo is both dangerous and a common source of park incidents. These requirements exist because animals in popular parks are often more habituated to human presence, which can make them seem calmer than they actually are.
Research the specific wildlife distance requirements for the park you’re visiting, they vary by species and by park. Use a zoom lens for photos rather than approaching, regardless of how calm an animal appears.
10. Check Trail Closures Before You Go
Trails close for a variety of reasons, wildlife activity, weather damage, seasonal conditions, and this information isn’t always obvious until you’re already at the trailhead. Planning a hike around a trail that’s actually closed wastes valuable time on a trip with limited days.
Check the park’s official alerts page the morning of your hike, not just when you initially planned the trip. Closures can happen with little notice, especially due to wildlife activity or recent weather.
9. Understand the Park’s Specific Food Storage Rules
Many parks have strict food storage requirements, particularly around bears, and not following them properly is both a safety risk and often a legal violation with real fines attached. These rules vary by park and sometimes by specific campground within a park.
Research the specific storage requirements for your destination before the trip, bear canisters or lockers are often required rather than optional. Never store food in a tent, regardless of what storage method you’re using.
8. Bring Cash for Areas With Limited Card Access
Some park facilities, particularly smaller stores or fee stations in more remote areas, don’t reliably accept cards, especially given limited connectivity. First-timers who assume cards work everywhere sometimes find themselves stuck at a specific location.
Carry some cash as a backup, even if you plan to primarily use a card for most purchases. This is a small precaution that avoids an unnecessary hassle in a remote area.
7. Check Fuel Availability Within the Park
Some parks, especially larger ones, have limited or no fuel stations within their boundaries, and running low on gas in a remote area of the park can turn into a real problem. This is especially relevant for parks with long entrance-to-entrance drives.
Fill up before entering the park, and research fuel availability within the park if your route is a long one. Don’t assume gas stations exist at regular intervals the way they do on a typical highway.
6. Pack Out All Your Trash, Even Biodegradable Items
Leave No Trace principles apply throughout national parks, and this includes items that seem biodegradable, like fruit peels, which can take a surprisingly long time to break down and can affect local wildlife behavior. First-timers sometimes assume certain trash is fine to leave since it’ll “break down eventually.”
Pack a dedicated trash bag and bring everything back out with you, regardless of how natural it seems. This applies to pet waste too if pets are permitted in the specific park area you’re visiting.
5. Check Pet Policies Before Bringing One Along
Pet policies vary a fair amount across national parks, and many restrict pets from trails entirely, allowing them only in developed areas like campgrounds and parking lots. Assuming a pet-friendly policy without checking can mean a frustrating surprise on arrival.
Research the specific park’s pet policy well before the trip if traveling with an animal. Some parks offer boarding facilities specifically because of these restrictions, worth knowing about ahead of time if trails matter to your itinerary.
4. Don’t Try to See Too Much in Too Little Time
Many first-time visitors try to cram an ambitious list of sights into a short visit, which usually means rushing through everything rather than genuinely experiencing any of it. Large parks in particular often require more driving time between areas than visitors expect.
Prioritize a shorter list of must-see spots rather than an exhaustive one, and build in buffer time for driving and unexpected stops. A slower, more focused visit tends to be more memorable than a rushed comprehensive one.
3. Check the Visitor Center for Current Conditions
Visitor centers have real-time information on trail conditions, wildlife activity, and weather that isn’t always reflected accurately online. Skipping this stop in favor of just following a pre-made plan means missing potentially important, current information.
Make the visitor center an early stop on arrival, even if you already have a plan for the day. Rangers there often have specific, current recommendations that go beyond what’s available in a general guidebook.
2. Respect Quiet Hours and Fellow Campers
If staying in a park campground, quiet hours and general campsite etiquette matter more than first-timers sometimes realize, especially in popular parks where sites are close together. This isn’t about being overly cautious, it’s just a basic courtesy that makes the whole shared experience better.
Check the specific campground’s quiet hours, they’re usually posted at check-in or on campground signage. A little consideration here goes a long way in a shared space that everyone’s there to enjoy.
1. Give Yourself More Time Than You Think You Need
The single biggest first-timer mistake is underestimating how much time a national park actually requires, for driving between areas, for hiking, for simply dealing with crowds during peak season. Trying to rush through a major park in a day or two often leaves visitors feeling like they barely scratched the surface.
If possible, build extra time into the visit beyond what feels necessary based on online itineraries. National parks reward a slower, less rushed pace far more than most other travel destinations, and giving yourself that buffer tends to be the single biggest factor in how good the trip actually feels afterward.